
A question I understandably get asked a lot is “what house projects are you guys working on now?”
All winter, my answer was “the cat house!”
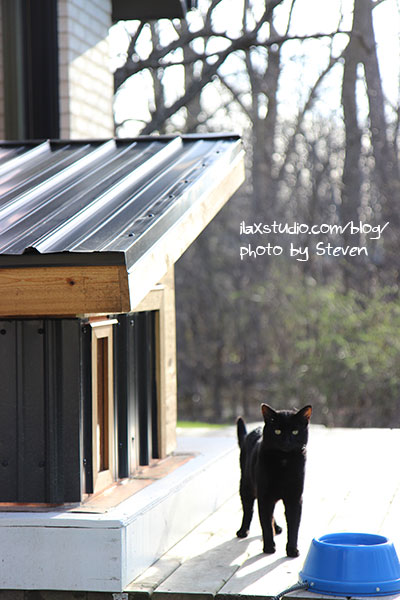
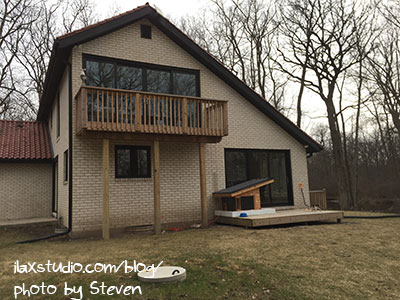
Our fall ended harshly with below zero temperatures and lots of snow. The outdoor cats were doing okay – we had store-bought heated kitty houses (which Jen and Troy generously helped us purchase!) that we further insulated with moving blankets and insulation, then built a little platform over to block the wind, and covered with a tarp. It looked lovely.
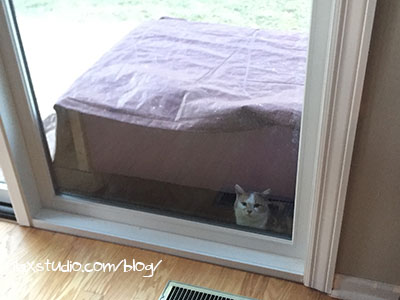
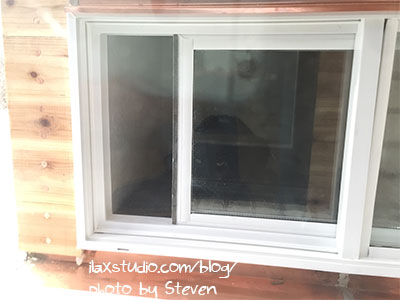
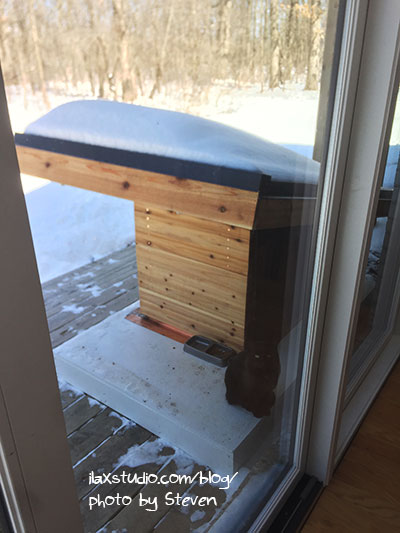
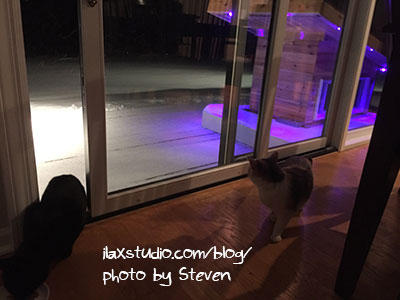
What the set up looked like from inside the house…
But we wanted something more permanent that:
- we could control the temperature in
- was visually pleasing
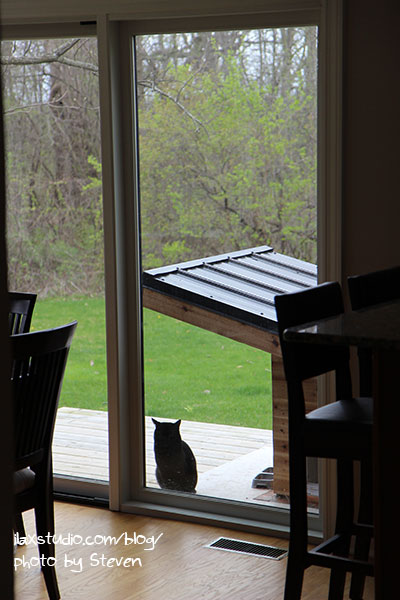
- we could see in to from our house
- wouldn’t blow away (ha)
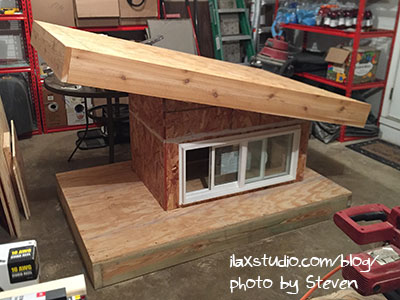
So, in December, Steven got to work building the cat house! We knew it would be costly, so we decided to have it be our Christmas gift to one another.
Steven used the cat house as an opportunity to learn about current house construction best practices. He already knew a lot, but this was his chance to try things out on a small scale! He spent a lot of time researching the best methods to build it, then sketched out the design.
And here is what he did! Get ready for LOTS of pictures!!! This is a loooooooooooooong post. But I want to document it all. I understand if you skim!
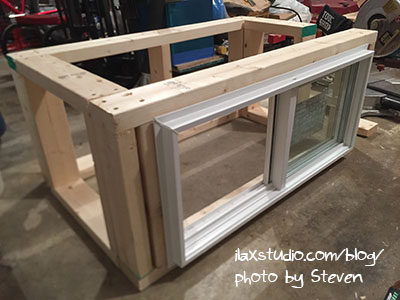
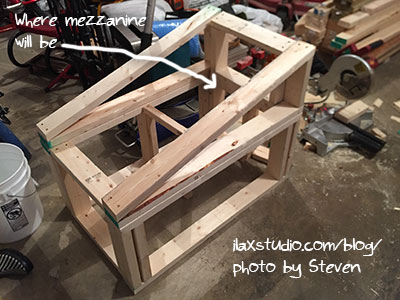
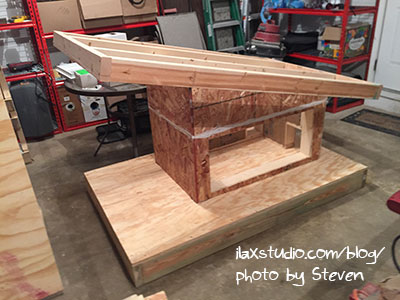
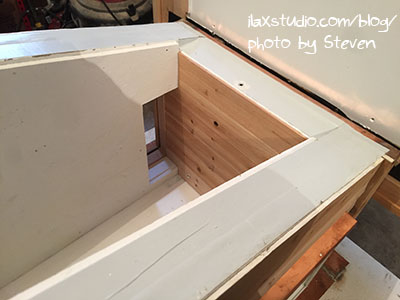
He built a frame using 2x4s, and used a basement window for the cats’ “sliding glass door” entrance (they have another exit, and a window). Edited to add: we used a glass door so we could see in from inside our house!
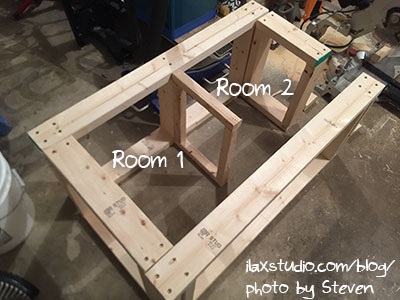
The house has two rooms, and a mezzanine. The room sizes are small so their body heat doesn’t escape and they stay warm in the winter!
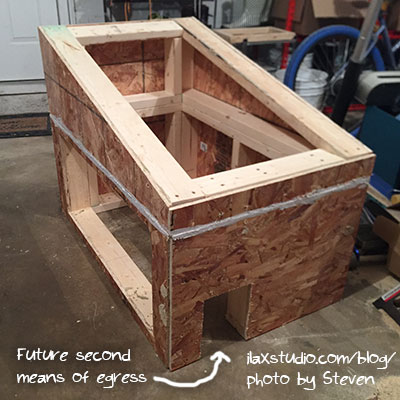
He used OSB for sheathing (which he had to cut apart and glue back together because the top was on backwards, oops!).
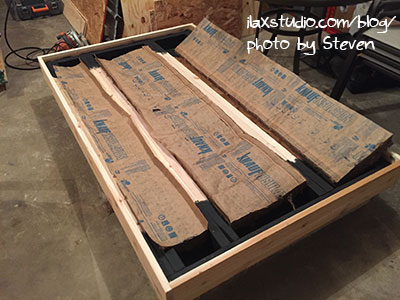
And insulated it with some leftover insulation from one of our attic projects (it’s either R11 or R13).
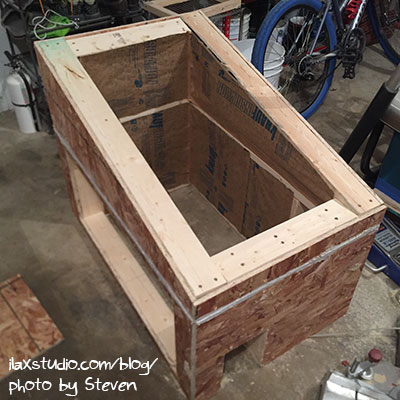
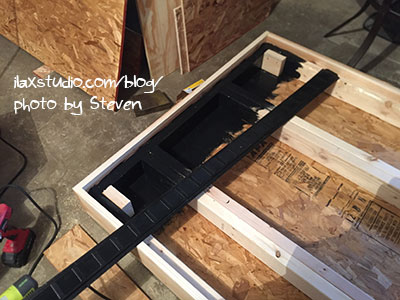
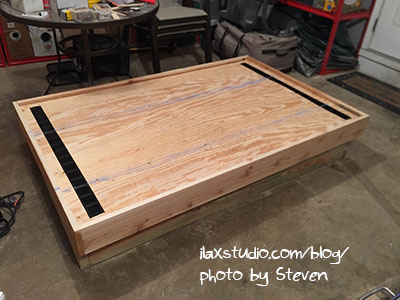
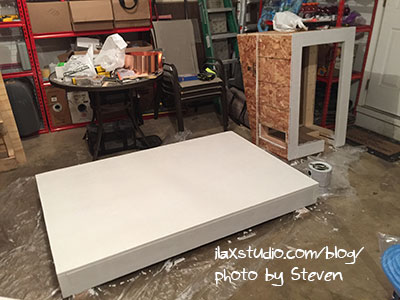
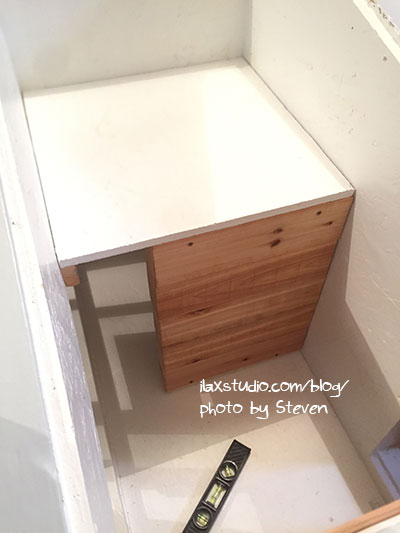
After building the house structure, Steven made the base,
(animated gif)
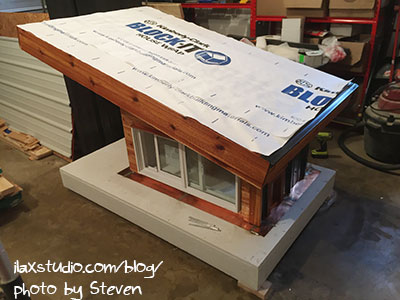
and the roof. The roof started out with a simple frame, like the base:
But had much more detail involved. Steven installed insulation, and vents (leftover from our attic construction) so that air could move through the roof and moisture wouldn’t be trapped inside. Steven painted the vents and part of the inside of the roof for aesthetics.
The roof also had to be designed precisely so that hinges could be mounted on it so it can be opened later! More on that below.
Starting to look good, right?!
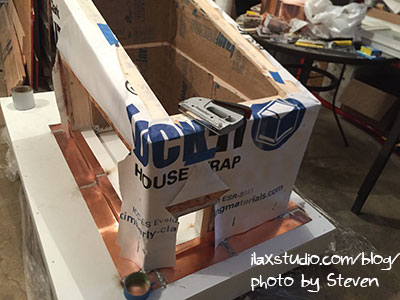
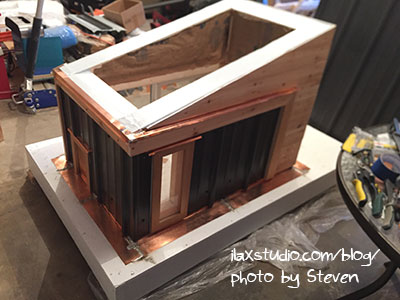
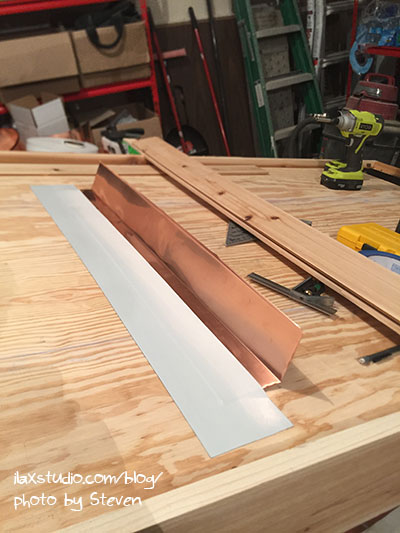
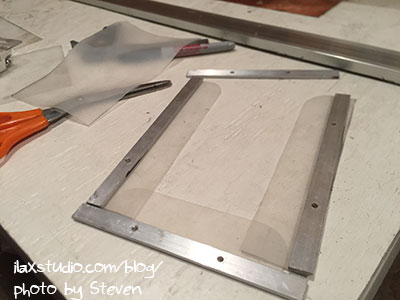
Next up, flashing. We brought the sheet metal brake home from storage, and Steven shaped all the pieces. He enjoyed getting his tools out of storage for this project!
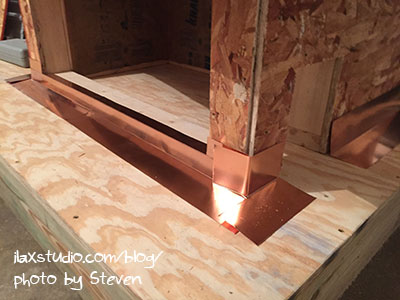
The flashing really adds a nice touch, and I think is one of the reasons we can charge what we do for rent.
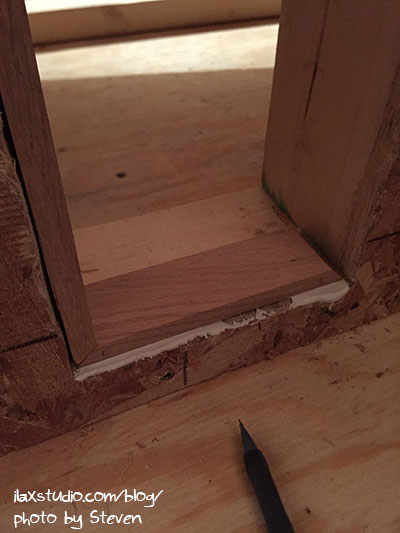
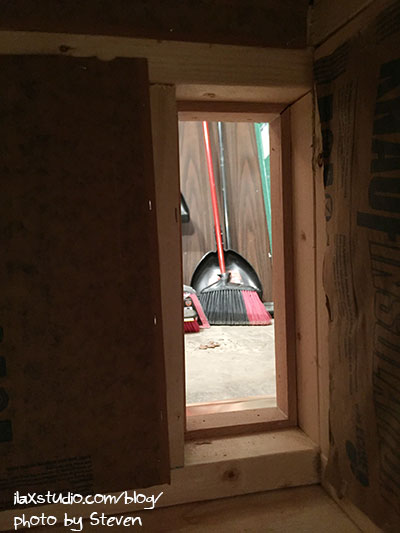
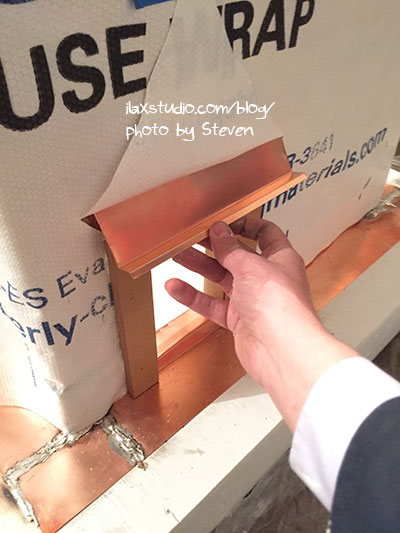
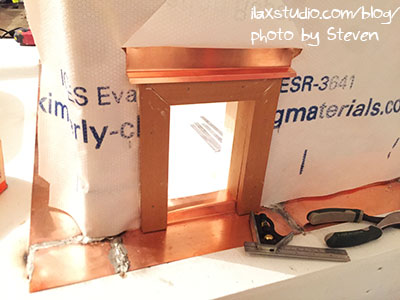
During this work session, Steven also framed out their window, so they can have a nice view of the yard (or that broom, ha).
He painted the base and bottom of the house with mold and mildew resistant paint to seal the wood.
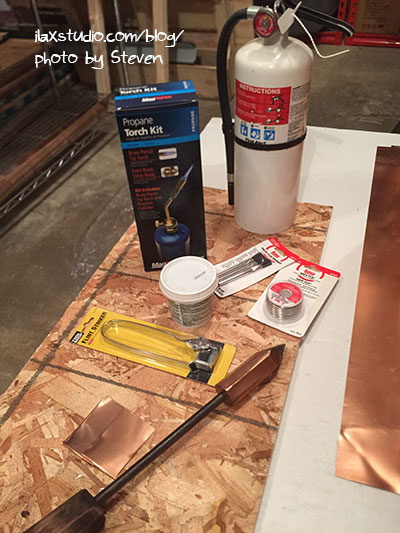
He ordered some cool vintage tools to solder the flashing,

but he couldn’t get them hot enough without a special furnace. Womp womp. Regular soldering with the torch, it is. Steven just had to be careful not to burn the wood (that’s a risk if you use a torch).
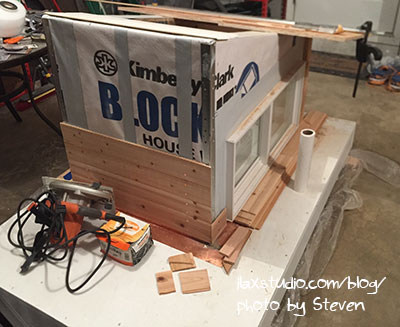
After the flashing was all soldered together, it was time to wrap the house. The house wrap is a moisture barrier, and was a lot of work to get all the details right (if you weren’t already thinking this whole thing was). Steven wrapped the entire house,
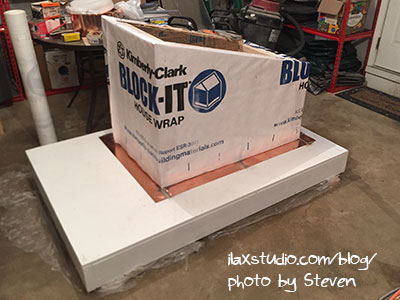
then cut off the parts for the openings and around the flashing.
Phew. It’s exhausting just writing about this!
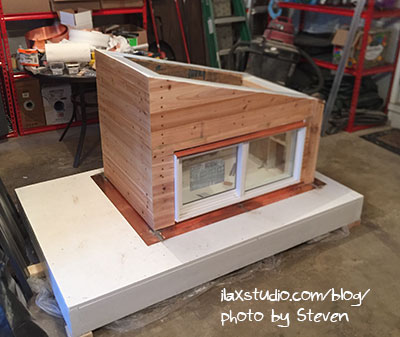
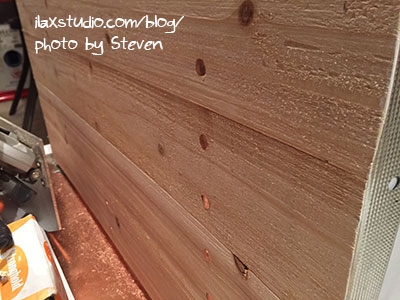
After the wrap was on, Steven could start applying some of the final siding, which was exciting – it was starting to look more like a finished product!
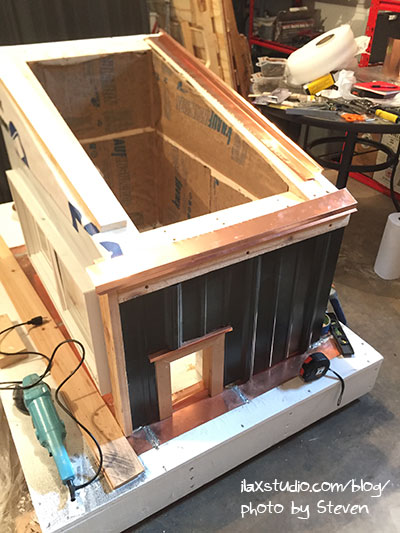
He still had some flashing to do on top of the siding – those corners look like they were a tricky!
(animated gif)
After that was done, Steven applied tape to seal all the seams. He used butyl tape, so it doubles as under-flashing in some areas, and it’s a self-healing membrane to nail/screw through for the siding.

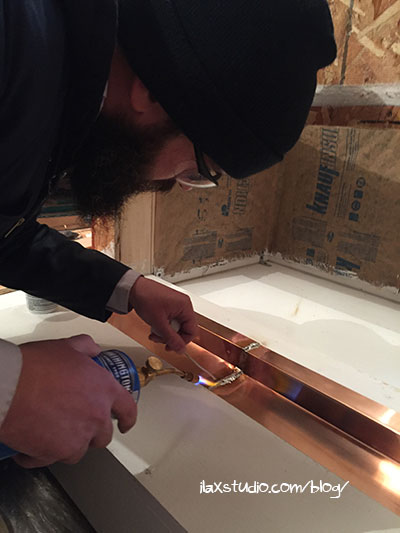
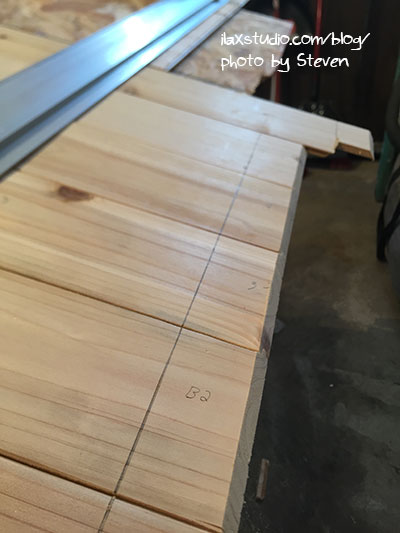
Then he began applying the rest of the siding! The siding took a lot of time to cut to the correct length, miter the corners, and get all the holes pre-drilled for the copper nails. The copper nails were leftover from our roof construction (you can see we reused as much as possible – there’s a reason we hold on to this stuff!). We thought they looked really cool!
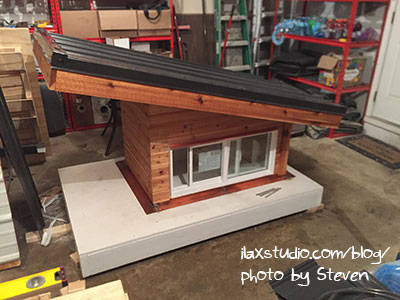
Then it was time for more roof work. Steven built a piece of flashing and precisely placed it on the underside of the roof so it would be flush against the front of the house and direct water rolling down the roof away from the house.
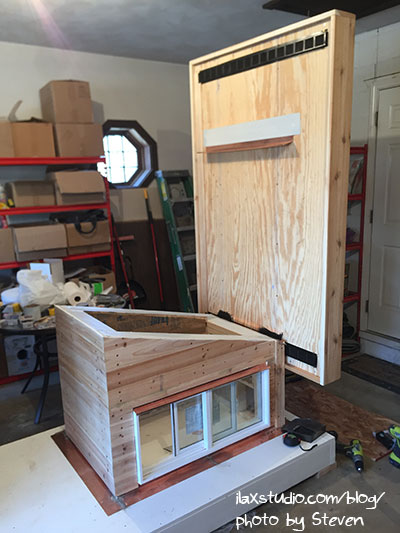
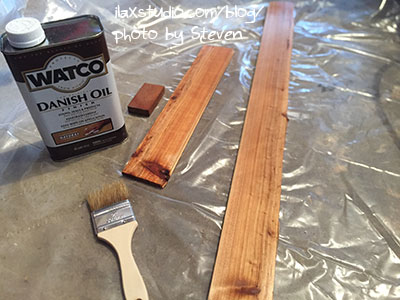
He then cut cedar siding to decorate the underside of the roof, attached the hinges, and voila!
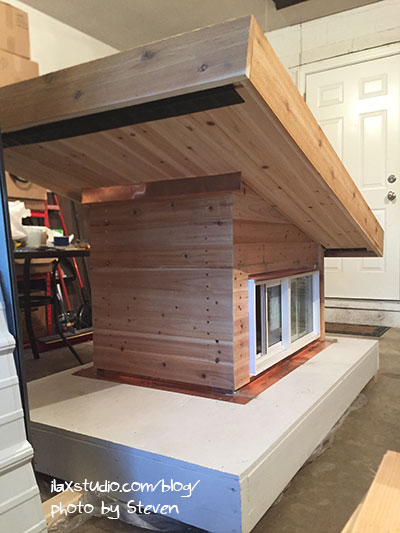
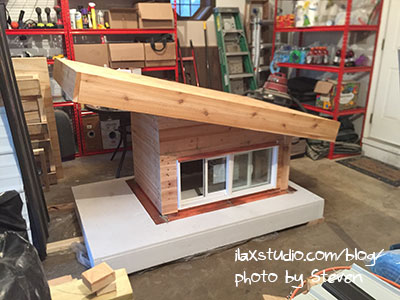
Looks close to being done, right?
NOT SO FAST!
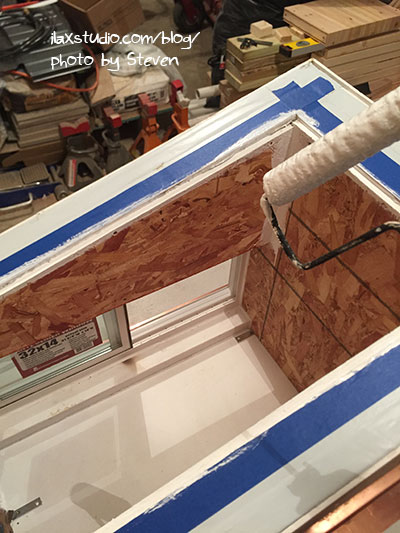
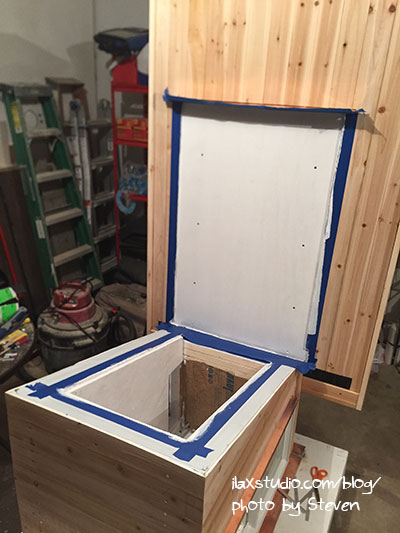
The inside of the house has to be painted!
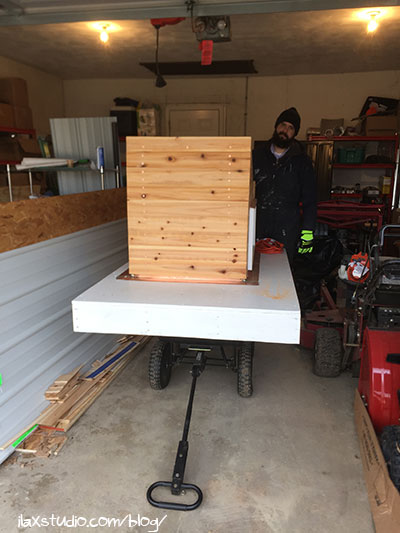
And the cedar siding “accent” wall has to be put together!
Here’s the mezzanine:
The house needs to be stained!
The second door needs to be put together!
The metal roof still needs to be attached!
Now it’s ready to go outside, right? Almost, friends. One final touch – gotta install wiring for the party lights!
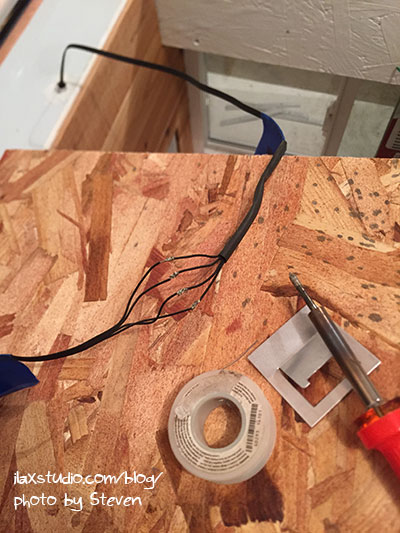
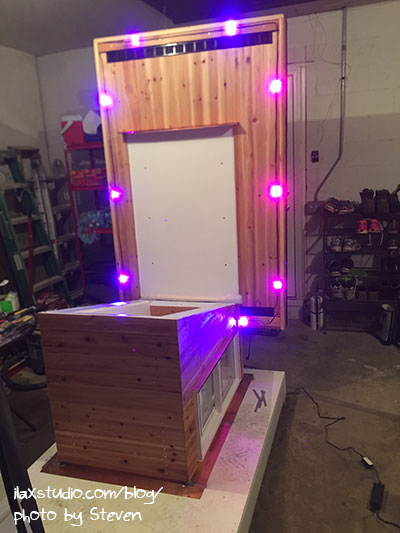
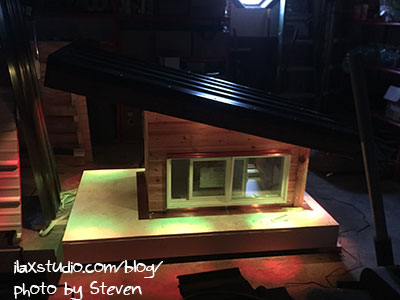
Every cat house needs adjustable-color lights you can control from your phone!
If you guessed that this thing is hella heavy, you are right. We took it outside in two pieces, on the second weekend of March (a few trips delayed this being done earlier!).
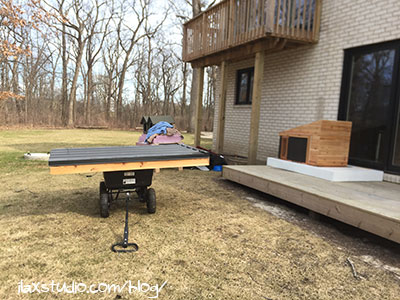
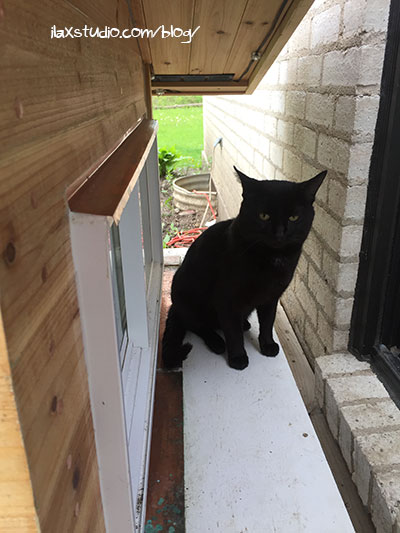
It was difficult to get the base on to our back porch, but we did it! And Snow used it right away! Yay! I was worried Steven would do all this work and Snow would be too scared of it to go nearby.
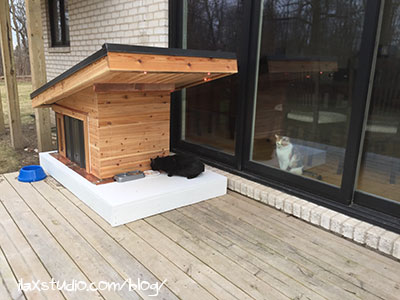
Horrible photo, but you can see Snow inside.
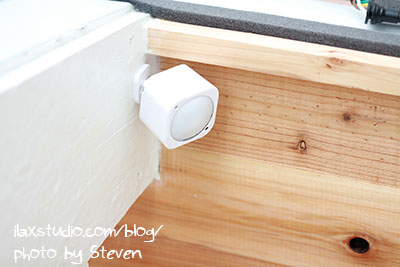
Steven still had a bit of work to do once we got it on the back porch. He installed an occupancy sensor so we can tell when Snow is in the house (from the SmartThings on our phones).
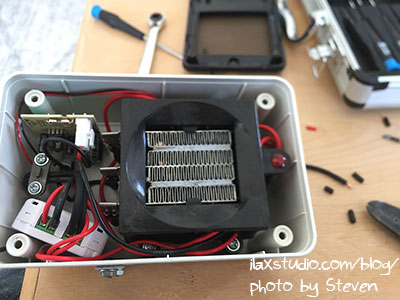
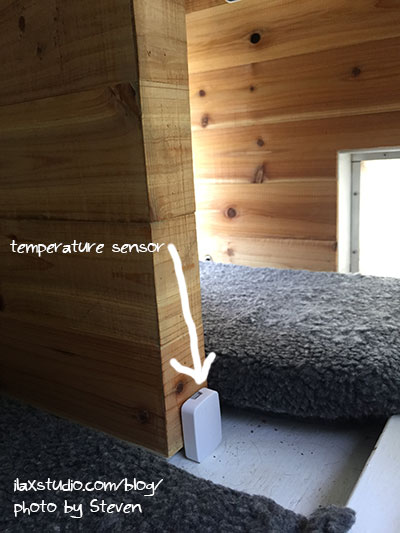
He bought a personal-sized heater (it was so late in the season they had to get it from storage, ha!) and customized it to attach to our SmartThings system (which I have never written about, but is how we control all our home automation stuff), so we can monitor the heat (using a temperature sensor) and keep it at a cozy 72°F. That is one lucky cat! Edited to add: you can see in two photos down that we are still using the heated pads that came with the store-bought houses!

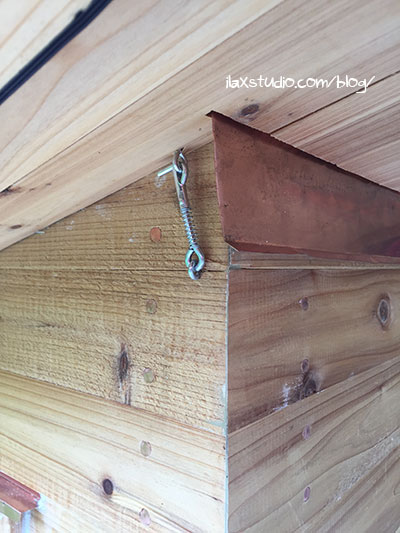
Steven also installed a hook and eye closure on each side of the roof in case it gets crazy windy!
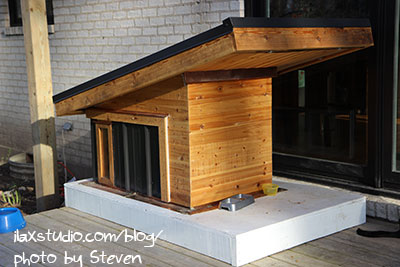
And! That’s it! You made it to the end! Snow has been using the house since we put it out there in early March. It’s kept him warm and dry, and it’s such a relief to us that he has a comfortable and safe place to live. And if any other cats show up, there is room for one to two more…

I am very proud of Steven for building something so beautiful and useful, but also, for his passion AND compassion with this project. He spent all this time and money making something for ONE cat that lives outside. And was very excited about it – we had so many conversations about the best way to do things! All I did was participate in those conversations, and help carry heavy stuff! Thank you Steven, for being so awesome! I greatly appreciate all the work you do in taking care of our home, inside and out!

That is so cool! I can’t believe the level of detail that he put into it. My version would probably be a plywood box, ha ha, no fancy interior paint and heat sensors!! How nice that you both gave up gifts to each other as well. You both rock.
Thank you!!!!! Your version would work well too! 🙂 They just need a safe, dry spot!
OMG, that’s amazing! What do you charge to build another one and ship it out to Oregon? 🙂
We’re in the middle of buying a house, and plan to build a catio for our two girls (there’s an existing pet door installed, that we’ll use as the entrance from the house), and I thought building that as a simple structure out of 2x4s and chicken wire would be an ambitious project!
Thank you! Ha! A lot! It’s better if he goes there and builds it 😉
Aww, perfect that you can do that! I would love a catio for our indoor babies! And it does sound like an ambitious project! Good luck!!!
Km – Steven did a great job on the design and build. I bet he learned so much from doing this small scale project. He seems like an extremely handy person willing to learn and try anything!
I love the colored lights! We have colored lights above our kitchen cabinets (my son installed them). They slowly cycle through the color spectrum and along with th under cabinet lights are on a motion detector, so turn on and off automatically! I love handy people!
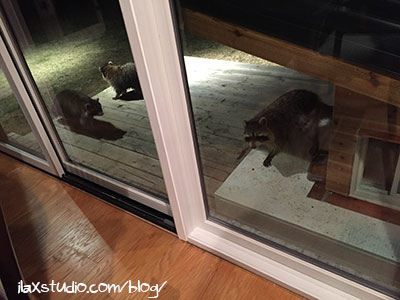
Are the raccoons a concern?
You nailed it – that is EXACTLY how Steven is! And he did learn a lot!
Oh cool, that’s fun! I bet that looks really cool in the darker winter months! Something cheerful with all that snow and cold, right?
Hmm. I am not sure. Ha. They are definitely there every night, looking for food. But so far, they aren’t doing anything to our house (or Snow, or his house) so we try to not leave food out to encourage them to come. Although they keep using his water bowl to wash their hands. I hope they don’t become a concern/nuisance, but I could see it going that way, unfortunately!
That is totally awesome. I need to turn off Netflix at night and start to build something! Maybe I could start with a bird house made out of a milk carton and work my way up to a cat house in about 10 years time!
Thanks! Ha! That is the way to start – small. It’s so rewarding to build something. I’m no good at it, but I’d at least like to get back to knitting or doing something other than just sitting around watching Netflix at night, too 😉
Love the post! I think the one thing this needs is an interview with the mad genius himself, Mr. Steven S. I’m sure your audience would love to here about the highs and lows, ups and downs, heartaches and elation that come with building a cat resort over the course of twelve months!
Thanks! He actually read over this and edited some of it for me, but maybe I should do a Q&A… 😉
“The flashing really adds a nice touch, and I think is one of the reasons we can charge what we do for rent.” Hahahahaha. That made me laugh 🙂
MY. GOSH. This is insnae! Seriously, what Steven made is a work of art. I am SO IMPRESSED. I think most human houses don’t look that nice, never mind cat houses! Everything about it is amazing – the detail, the thought, the way it architecturally echoes the design of your house. Standing ovation. I’m, like, angry that the cat can’t even say thank you for this, because it’s so amazing it feels wrong that the recipient can’t say thanks. Haha. Snow is the luckiest outdoor cat in the entire world!
Aww, thank you for laughing at my joke!!! And for reading this whole thing and your very kind words!!! 🙂 You must have an eye for architecture to pick up on that – Steven was playing off of the design off the roof line of our house – good eye!!!
LOL re: Snow not being able to say thank you. There should be a pile of dead mice outside the dining room door every day, right? Ha. We are just happy he uses it! It’s so nice to see him dry and safe when we have bad weather!
wow! That is so cool! Amazing! I love that on that one picture, with the house wrap, it literally says “Kimberly Block House”. So glad Snow is happily using it, too.
Thank you! Ha ha, we always joke about how the houses wrapped in that brand of wrap are mine. Ha!
This is truly AMAZING!!!
Thanks!
This is the classiest, most well-thought-out cat house in the world! It’s beautiful. Steven did such a great job with it…maybe he could start building tiny houses for those millennials who think they want to live in 300 sq. ft. But seriously, great job!!!
Thanks so much! I think he did a great job, too! I think he could build a tiny house! We actually want to build a shed but what we’d like to build may be cost prohibitive, ha ha!
Holy sh*t—that is AMAZING! Like, truly… amazingly designed and built. The care and love for your animals is absolutely beautiful.
Thank you 🙂 🙂 🙂
Wow, impressive! But what DO you charge for rent? 🙂 And what do you do about the racoons??
It’s supposed to be $125 a mo, but he is already late on three months rent. When the raccoons are there, and we see them, we open the door and tell them to leave. If there is food that Snow hasn’t eaten, we throw it out, to deter the raccoons from coming back.