
We have exciting garage news that I bet you would never guess from the title! Ha. But yes – the slab was poured this week!
We couldn’t easily do much more work before the slab was poured, because we’d prefer that firm surface to put our ladders on, rather than on the soft soil or on boards between radiant heating. It was super annoying to move the boards and ladders around to avoid damaging the radiant heating tubes. S-U-P-E-R.
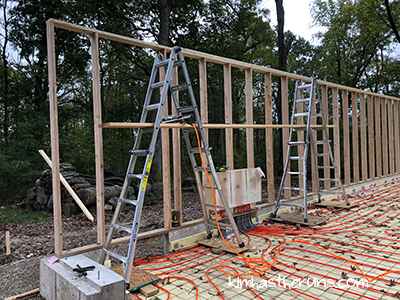
As fun as this is to set up…
So we did minimal work last weekend. On Sunday, Jen and Troy helped us firm up the framing by installing the rest of the top plates. We also put insulation in under the two door openings.
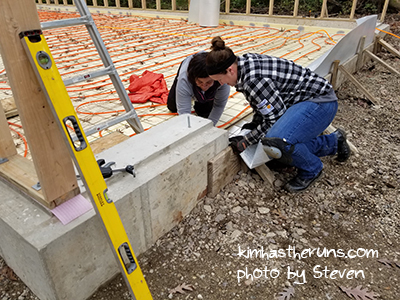

On Tuesday, Steven and I confirmed everything was secured and aligned for the slab pour. We taped down all of the loose insulation we installed Sunday and the week before. We checked that all the radiant heating tubes were secured, aligned, and the correct distance from one another. We thought it was ready to go!
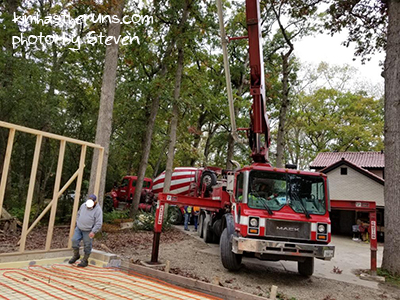
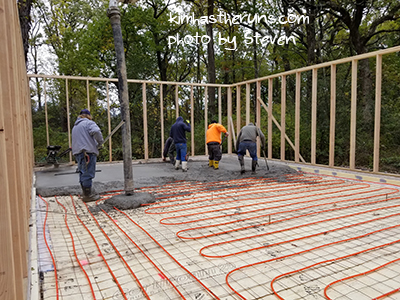
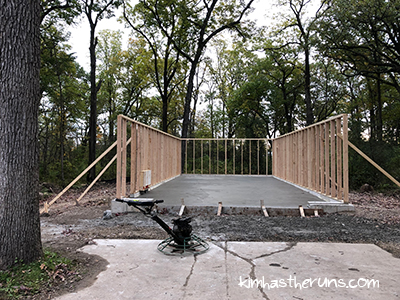
On Wednesday our contractor arrived to pour the slab. To ensure that the top of the slab is at the correct height (sloping slighting from back to front), they pounded in rebar in an 8′ grid and used the tops of each rebar as a reference height (if you squint you can see them poking up in the photo below).

Then they got started! They quickly figured out that we did not have enough zip ties on our radiant heating tubes (we put them 3′-0″ on center) and the tubes were moving up with the concrete! Steven rushed around adding extra zip ties to keep the tubes down. The tape we used for the loose insulation held it in place, phew.
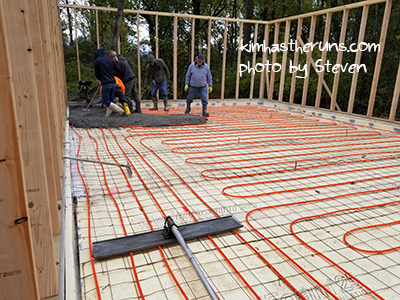
I wish I would have been working from home to watch them pour. I’m glad Steven was there. He had to be there to make sure the radiant heating tubes weren’t moving, and that the pressure in the system was staying steady (indicating that the tubes had not been punctured).
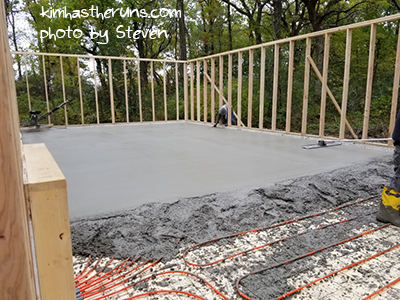
This is what 5″ of concrete looks like
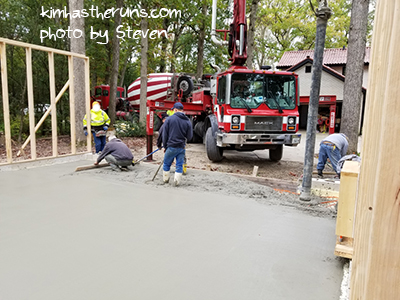
Steven said they started just before 10:00 am and finished pouring at noon. The steps were as follows:
- Pour an 8′ section
- Screed (new word for you!) that section with a 2×4, and use rakes to move the concrete around as needed to make it level
- Find the reference rebars and pound them down
- Used a bull float to level the ridges and voids left from screeding, and make it all nice and smooth / use hand floats around the edges of the concrete for the same effect in that location
- Repeat!
Then they took a pizza break!
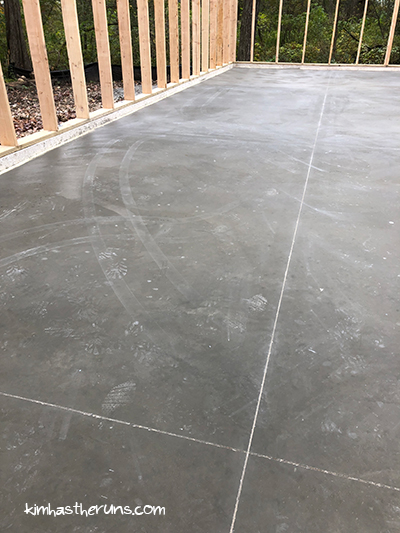
After the break, the concrete was cured enough to walk on in the back of the garage where they started. Steven said it was odd to see them leaving footprints on it, but the reason they were walking on it was to use a power trowel to smooth out the top even more. And it did!
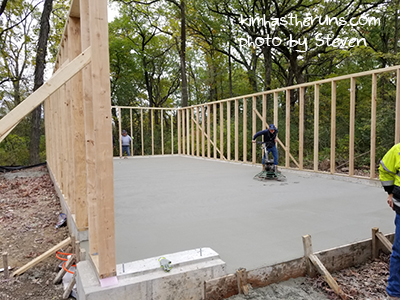
You can see the power trowel here
On Thursday they cut control joints in to the slab. Due to shrinkage (hee hee), cracking occurs naturally during the curing process, and the control joints guide where the cracking will occur – hopefully along that joint. The cuts are 3/4″ deep, and Steven checked the pressure on the radiant heating system before and after to make sure no tubes had gotten too close to the surface and been cut by accident. Thankfully, they weren’t! If they had been, we would have been SOL and not able to use that part of the radiant heating… because it’s buried and concrete and there’s nothing we could have done about it at that point.
 ‘
‘
We know concrete takes time to cure, and we were hoping we could get ladders on it on Friday, but they said to wait until Saturday afternoon. Apparently it gets 95 or 98% of its strength in the first three days, then takes 30 days to fully cure. So when we get ladders up on it, we’ll still put boards underneath, so it doesn’t imprint the concrete. Steven said there is plenty for us to do on Friday without ladders on it just yet.
Previous post: Garage Project: Radiant Heating and Beginning to Frame

Wow that was a lot of checking during the pour (totally worth it for that radiant heating, of course) and double wow on how thick the slab is! I guess I never see a residential garage until it’s finished with a driveway, so I had no idea how thick it is. It looks good!!!
OK, so where did you guys sign it?
I was surprised by how thick it looked too! I couldn’t believe it was only 5″!
Since I was working in the city we didn’t do our hand prints 🙁 We are going to do them in the sidewalk that goes to the man door. Funny thing, I mentioned to my dad that we did this as kids to his garage and he didn’t remember at all. Ha.
Ha, as I was reading this I was like, “Boy, I wonder what happens if one of the tubes does get punctured.” Then you answered my question! I’m really glad to hear it went smoothly and puncture-free! Actually, the more I think about it, the more it seems like that could’ve been a really big problem – wouldn’t the contents of the tube leak if they were punctured? Ugh, what a headache that could’ve been. Hooray that it didn’t happen!
Yes! I am so glad it went smoothly. It would have been sad to know that one part of the system (or more!) wasn’t being used. Right now, there is only air in there, so that’s all that would have leaked. Eventually they’ll have water and glycol in them.
Wow, this was super interesting. I had no idea about the pre-cuts to ensure even cracking. That’s very neat.
Why did you have it sloping? For any water run off?
You told me about Steven having to add MORE zipties, but I didn’t realize it was because you needed to anchor every bit of those tubes in place. It didn’t occur to me that they’d float and have bits sticking up that could then get cut. This is so complicated.
I may have asked this: why did you need contractors to pour the concrete? I assume this is not a feasible DIY option. (Everything you’re doing is so complex; I’d probably think I needed to hire someone for every step of it.)
Isn’t that cool with the control joints? Fingers crossed that is where cracking occurs!
Yeah, I think the slope is so anything liquid in the back goes toward the front and out, rather than pooling up. I will have to double check with Steven!
I didn’t think the radiant tubes would float that much either. It kind of blew my mind. I REALLY thought we had enough freaking zip ties down, geesh. I had saved all the extra ties I cut off and was going to count them and tell you how many there were… but I obviously have not done that yet.
Yeah, the concrete is not a feasible DIY since there is so much of it, and it’s such a craft. I mean, look at how beautiful and smooth that surface is! That takes skill. We haven’t even messed with it in small batches, and it would be a nightmare to buy all the materials and rent the truck and get it on to our property (our driveway is kind of tricky), so that’s a nope. We hired out the earth moving/shaping because we don’t own the machinery to do it ourselves, and are hiring out the brick work (on the two front corners) because as much as we’d love to learn to do that, we don’t want to learn on our permanent garage. That’s a another very skilled craft! We’re hoping we can do the roof ourself and no hire out. My dad offered to help us with it, and he’s done several, so I think we’ll be good!
Wow! I am learning a lot by reading your posts and the comments – such a complicated process!